Key Takeaways
Why Brakes Deserve Their Own Test Protocol
Most buyers spend their test drive thinking about acceleration, seat comfort, and infotainment. Brakes get a quick tap at a stop sign and nothing more. That's a mistake that can cost you $400 to $2,000 in repairs within weeks of buying the car.
Brakes are the most safety-critical system on any vehicle, and they're also one of the easiest systems to evaluate without any tools. Everything you need to know, you can feel through the pedal and the steering wheel in a 20-minute drive. The problem is that most buyers don't know what to feel for or how to run the tests that expose real problems.
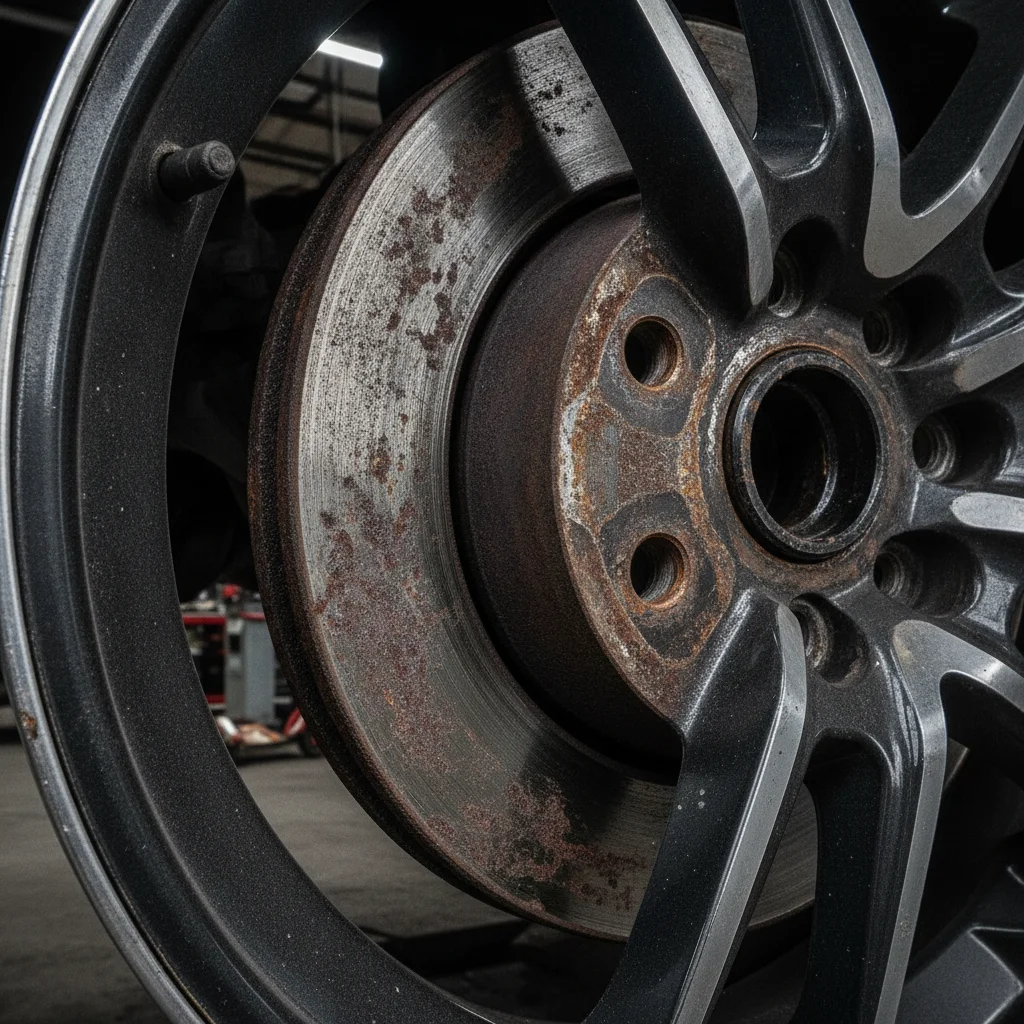
This guide gives you a concrete, repeatable protocol — the same approach I use when evaluating any used vehicle. It works on $5,000 econoboxes and $50,000 luxury SUVs alike. Before you run any of these tests, though, make sure you've done the basics: check for brake dust on the wheels, look through the spokes for rotor condition, and glance at the master cylinder reservoir if the hood is up. Those visual cues set the context for what you're about to feel.
For a broader framework on what to evaluate during a test drive beyond just brakes, see our complete test drive tactics guide — brakes are one piece of a larger evaluation picture.
What You'll Need Before You Start
You don't need specialized equipment to evaluate brakes properly, but you do need the right conditions and a little preparation. Make sure the car has been sitting for at least 20–30 minutes before the drive — you want cold brakes at the start so you can observe how they behave as they warm up.
What you will need
Notepad or Notes App
Record specific observations from each brake test so you have concrete details for negotiation.
Smartphone with voice memo
Capture brake noises during the drive by recording audio through your phone while you focus on driving.
Flashlight or phone torch
Inspect rotor surface condition and brake pad thickness through wheel spokes before the drive starts.
Latex or nitrile gloves
Allow you to safely check rotor temperature and caliper condition after the drive without contaminating brake surfaces.
Also, plan your route in advance. You need at least one stretch of empty road where you can safely reach 35–45 mph and perform a hard stop. A short loop around a parking lot will not give you what you need. As we cover in why a short test drive can fool you, a 10-minute spin rarely exposes brake fade or progressive pedal problems.
Step-by-Step: Running the Brake Evaluation
Run these steps in order. Each one builds on the last, and skipping ahead means you'll miss the progression from normal to stressed braking that reveals wear patterns.
Start with a slow-speed feel test in a parking lot
Before you hit any public road, find an empty section of parking lot and perform several slow stops from 10–15 mph. Press the brake pedal firmly but not aggressively and pay close attention to three things:
- Pedal travel: How far does the pedal move before resistance builds? A pedal that travels more than halfway to the floor before you feel real stopping force is a red flag.
- Pedal firmness: Is the resistance solid and consistent, or does the pedal feel soft and spongy, like pressing into a foam cushion?
- Vehicle tracking: Does the car stop straight, or does it immediately pull to one side?
These slow-speed stops establish your baseline. Everything you feel in later tests will be measured against this initial impression.
Check for brake noise at low speed
Roll the windows down and turn off the radio and climate control entirely. Drive slowly — under 15 mph — and apply the brakes lightly several times. Listen specifically for:
- Squealing or squeaking: A brief squeal on the first stop of a cold morning can be normal (light surface rust on the rotor). Squealing on every stop is not.
- Grinding: Any metal-on-metal grinding noise means the pads are worn through. This is a stop-everything finding.
- Rhythmic clicking or thudding timed to wheel rotation suggests a loose component or severely warped rotor.
If you hear grinding at any point during the test drive, note it and mentally prepare to factor in rotor and pad replacement costs — typically $300–$600 per axle — into your negotiating position.
Perform a moderate stop from 30 mph
Find a safe, clear stretch of road. Accelerate to approximately 30 mph, then apply firm, steady brake pressure — not a panic stop, but firm enough that you're stopping decisively in 2–3 seconds. During this stop, observe:
- Vibration through the pedal or steering wheel: A pulsating pedal or steering shimmy during braking almost always indicates warped rotors. Note how strong the pulsation is — minor shimmy might be drivable short-term, pronounced vibration is an immediate repair.
- Directional pull: Does the car want to steer left or right under moderate braking? Even slight consistent pull should be documented.
- Pedal consistency: Does the pedal feel the same as in your parking lot baseline, or has it changed now that the brakes are slightly warmer?
Repeat this test two to three times with about 30 seconds between each stop to allow partial cooling.
Execute a hard stop from 40–45 mph
This is the most revealing single test in the entire protocol. You need a safe, clear road — no traffic behind you, no intersections ahead. Accelerate to 40–45 mph and apply maximum braking pressure, stopping as quickly as possible without triggering a panic response in your body.
What you're evaluating:
- ABS activation: On most modern cars, ABS will pulse the pedal under hard braking. This is normal and expected. What's not normal is the pedal going to the floor or feeling completely wooden with no ABS feedback.
- Pull under maximum load: Brake pull that was subtle at moderate stopping becomes pronounced under hard braking. A car that pulls hard during an emergency stop is dangerous.
- Stopping distance feel: Hard to quantify exactly, but a car with badly worn pads or fade-prone rotors will feel like it's taking too long to stop. Trust that feeling.
- Post-stop pedal feel: After the hard stop, while still at rest, press the pedal firmly again. Does it feel the same as before, or has it softened? Softening after a single hard stop suggests seriously degraded fluid or borderline pads.
Test for brake fade with repeated stops
Brake fade occurs when heat builds up beyond what the system can handle, causing a noticeable reduction in stopping power. To test for it, find a route that allows you to make five to seven moderate stops from 25–30 mph in succession, with only 20–30 seconds between each stop. This simulates stop-and-go traffic or a long downhill grade.
After the third and fifth stops, note whether:
- The pedal has dropped lower toward the floor (fluid fade)
- Stopping distance seems to be increasing
- You smell a burning or chemical odor from the brakes
- The pedal feels softer or less responsive
Some minor increase in pedal travel after repeated stops can be normal on a vehicle that's been sitting. A significant change — pedal dropping more than an inch, or noticeably longer stopping distances — indicates a brake system that's not managing heat effectively.
Do a final check: release behavior and parking brake
Two quick checks that most buyers skip entirely:
Release behavior: After stopping, release the brake pedal completely and let the car coast forward. Does the car roll freely, or does it feel like it's dragging? A car that drags after the pedal is released has a sticking caliper — one of the most common brake problems on vehicles that have been sitting. A stuck front caliper will also run one rotor hotter than the other, which you may be able to feel through the wheel (carefully touch the wheel rim, not the rotor or caliper, after a few minutes of driving).
Parking brake: Set the parking brake with the car on a slight incline. It should hold the car without requiring you to yank it to its maximum extent. A parking brake that barely holds, or requires maximum engagement to hold position, has a stretched cable or worn rear shoes/pads. This is a $150–$300 fix but tells you something about how well the car has been maintained overall.
Plan Your Route Before You Arrive
Don't leave your brake evaluation route to chance. Look up the area on a map before you go and identify a low-traffic road where you can safely reach 40–45 mph. This is especially important at dealerships, where the typical test drive loop is designed for comfort, not for system evaluation. Politely tell the salesperson you'd like to take a specific route — most will allow it.
Cold Brakes vs. Warm Brakes Tell Different Stories
The first few stops of a cold brake system sometimes feel spongier than they will after warm-up — this is partially normal. Always do your initial baseline tests in the parking lot, then re-evaluate pedal feel after 10 minutes of driving. If the pedal firms up significantly once warm, that's reassuring. If it softens, that's a problem.
Compare Notes with a Second Test Drive
If brake feel seemed borderline during your first drive, schedule a second test drive on a different day. Cold start behavior, different road conditions, and a fresh perspective often clarify whether what you felt was a real problem or a minor quirk. This is especially useful on high-mileage vehicles where some brake variation is expected.
Never Skip the Hard Stop Test
Slow-speed parking lot stops will not reveal warped rotors, brake pull under load, or fade-prone pads. The hard stop from 40–45 mph is non-negotiable for any serious used car evaluation. If the seller or salesperson refuses to allow a hard stop test, treat that refusal as a significant red flag about the car's condition.
Don't Dismiss Intermittent Brake Pull
A car that pulls only slightly during moderate braking may pull dramatically under emergency braking. Directional pull is a safety concern, not a cosmetic one. Even if the seller insists it's normal or explains it away, get it in writing that you performed a brake evaluation and document your findings before purchase.
Interpreting What You Found
Raw sensations mean nothing without a framework for interpreting them. Here's how to translate what you felt into specific brake conditions and repair cost estimates.
Pedal Feel Problems
- Spongy or soft pedal
- Air in the brake lines or degraded brake fluid. Brake fluid absorbs moisture over time, which lowers its boiling point and creates a compressible vapor pocket. A brake bleed and fluid flush typically runs $80–$150. If the spongy feel is severe, also suspect a failing master cylinder ($200–$400 parts and labor).
- Pedal that sinks slowly under steady pressure
- This is a master cylinder symptom. The internal seals are worn, allowing fluid to bypass. Don't buy the car without negotiating for this repair — it's a safety issue, not a cosmetic one.
- High, firm pedal that requires extra force
- Possible vacuum booster failure. The power brake booster should amplify your foot pressure; when it fails, stopping distances increase significantly. Booster replacement runs $200–$600 depending on the vehicle.
Noise During Braking
- Grinding metal-on-metal sound
- Pads are worn through to the backing plate, and the rotors are likely scored. Budget for pads plus rotor replacement — typically $300–$600 per axle, not per wheel.
- High-pitched squealing
- Could be the wear indicator tabs (designed to make this noise as a warning) or glazed pads. Either way, the pads need inspection immediately. Don't assume it's minor.
- Clunking or thudding under braking
- Look at suspension and caliper hardware, not just the pads. A loose caliper bracket or worn suspension bushing can create brake-triggered clunks. This requires a lift inspection before purchase.
Vibration and Pull
- Steering wheel shimmy or vibration when stopping
- Warped rotors. The uneven rotor surface causes pulsating clamping force. Rotor replacement (or machining, if enough material remains) runs $150–$400 per axle. This is very common and highly negotiable.
- Car pulls left or right during braking
- One side is applying more force than the other — usually a stuck caliper, uneven pad wear, or a collapsed brake hose. A stuck caliper runs $150–$300 to replace. Don't confuse this with normal road crown drift; true brake pull is pronounced and directional.
For a deeper breakdown of what each symptom means in daily driving context, our article on brake feel changes and red flags covers the full spectrum from normal variation to failure-mode signals.
Grinding Brakes Are a No-Drive Situation
If you hear metal-on-metal grinding at any point during your test drive, the pads are completely worn through and the rotors are being damaged with every stop. Do not continue the test drive — you are reducing the braking surface with each application. Park the car, document what you heard, and either negotiate a price that includes full brake replacement on both front wheels or walk away.
A Pedal That Sinks Under Steady Pressure Is Dangerous
If you hold steady brake pressure at a stop and the pedal slowly creeps toward the floor, the master cylinder is failing. This is not a deferred maintenance issue — it is an active safety failure that can result in brake loss at highway speed. Do not purchase a vehicle exhibiting this symptom without a confirmed master cylinder replacement completed by a licensed shop.
Using What You Found at the Negotiating Table
Finding brake problems isn't a reason to walk away — it's leverage. The key is converting your observations into documented repair estimates before you make a counteroffer.
Here's the practical sequence:
- Identify and name every symptom you noticed during your evaluation. Write them down with specific descriptions: "vibration at 35 mph under moderate braking," not "brakes feel weird."
- Get a quick phone estimate from two local shops. Call and describe the symptoms — most shops will give you a ballpark over the phone for common brake work. Take notes on their names and estimates.
- Present this during negotiation as a documented cost, not an opinion. "I noticed rotor vibration and brake pull on the left front. Two shops quoted me $350–$450 to address that. I'd like to adjust the price accordingly" is far stronger than "the brakes feel rough."
- Ask for a pre-purchase inspection (PPI) if the seller resists your estimates. A $100–$150 inspection by an independent mechanic will either confirm your findings or clear the car — either outcome is worth the cost.
On a used car in the used car buying process, brake repairs are among the most legitimate negotiating points because they're objective, safety-related, and easily quoted. Sellers know this, and most will negotiate rather than lose a deal over $300 in rotor work.
Also consider how brake condition affects the car's actual market value. If you're using valuation tools like KBB or Edmunds to set your offer baseline, remember those tools assume good mechanical condition. A car with deferred brake maintenance should be priced below the "good condition" estimate, not at it.
Finally, if you're evaluating an electric or hybrid vehicle, note that regenerative braking changes the wear pattern on traditional friction brakes — EVs often have low pad wear but can have brake dust buildup and caliper corrosion from infrequent use. Check out evaluating an EV or hybrid on a test drive for EV-specific brake considerations.
Brake Service Costs: What to Budget After Purchase
Even if the brakes pass your test drive evaluation, knowing where they are in their service life helps you plan upcoming costs. Brakes don't wear evenly or predictably — driving style, vehicle weight, and brake design all affect longevity. Our brake service timeline guide explains how pads, rotors, and fluid interact and when each component typically needs attention.
| Component | Typical Lifespan | Replacement Cost (per axle) | DIY Feasibility |
|---|---|---|---|
| Brake pads | 25,000–70,000 miles | $80–$250 | Moderate |
| Rotors | 50,000–70,000 miles | $150–$400 | Moderate |
| Brake fluid flush | Every 2–3 years | $80–$150 (full vehicle) | Advanced |
| Calipers | 75,000–100,000+ miles | $150–$400 each | Advanced |
| Brake hoses | 100,000 miles or age-based | $100–$200 each | Advanced |
Use these figures as a planning baseline, not a guarantee. High-performance or luxury vehicles can run two to three times these costs for OEM-quality parts. Factor any near-term brake service into your total cost of ownership calculation before you finalize a purchase price.
Also worth noting: if you're buying a car and plan to use a telematics-based insurance policy, your braking behavior behind the wheel directly affects your insurance rate. Understanding what telematics measures around hard braking can help you understand how that system works and what habits affect your premium.

All claims are backed by peer-reviewed research. Sources on request.