Key Takeaways
Always cross-reference your owner's manual oil viscosity spec against what's actually in the car before adding any fluid. Someone before you may have used the wrong grade, and mixing them compounds the problem.
Using an incompatible oil viscosity accelerates engine wear and can void powertrain warranties — a risk that's entirely preventable with a 30-second manual check.
When installing new spark plugs, hand-thread them all the way in before using a wrench. If you feel resistance before they're flush, stop — you may be cross-threading, which destroys the cylinder head threads.
Cross-threaded spark plugs require helicoil inserts or cylinder head replacement — a repair that costs hundreds of dollars versus the seconds it takes to be careful during installation.
After a brake pad replacement, bed in the new pads properly: make 8–10 moderate stops from 30 mph without coming to a complete stop, then let the brakes cool for 10 minutes before driving normally. This seats the pad material evenly on the rotor.
Skipping the bedding process leads to uneven material transfer, which causes pedal pulsation and reduced braking performance — exactly what you just spent time trying to fix.
Keep a cheap digital tire pressure gauge in your glove box and use it weekly during temperature swings. Tire pressure drops roughly 1 psi for every 10°F drop in ambient temperature.
TPMS warning lights typically don't trigger until a tire is 25% below recommended pressure — by which point handling and wear are already being compromised.
When replacing a bulb, wear nitrile gloves or avoid touching the glass with bare skin. Skin oils on halogen bulbs create hot spots that cause premature failure.
This is one of the most common reasons newly replaced halogen bulbs burn out within weeks — it's entirely preventable with a simple habit.
Why DIY Maintenance Pays Off
Shop labor rates in the U.S. average $100–$160 per hour, and that number climbs fast at dealerships. A basic oil change that costs $12 in parts gets billed at $60–$90 once you factor in shop overhead. Do that four times a year and you've handed over $200–$300 for something you could handle yourself in 30 minutes on your lunch break.
$100–$160
Average U.S. shop labor rate per hour
Labor rates at dealerships frequently exceed $160/hr, making DIY maintenance economically significant even for simple tasks.
~$200
Annual savings from DIY oil changes
Doing four oil changes per year at home instead of a shop saves the average driver $150–$250 annually in labor alone.
25%
Of cars on the road have significantly under-inflated tires
According to NHTSA surveys, roughly one in four vehicles operates with at least one tire under-inflated by more than 8 psi.
3–5 years
Typical car battery lifespan
Most standard lead-acid batteries need replacement within this window, regardless of how much or how little the car is driven.
$1,500
Potential resale premium for documented service history
Automotive valuation data consistently shows that cars with verifiable maintenance records sell faster and for more money at private-party and dealer appraisals.
Money is only part of it. When you do your own maintenance, you get eyes on the car regularly. You notice the small coolant weep before it becomes an engine overheat. You catch the brake pad that's thinning unevenly before it eats into the rotor. Shops are busy — they're not always going to catch the edge-case stuff. You will, because it's your car.
There's also a resale argument. A car with a documented history of consistent, timely maintenance — even DIY maintenance recorded in a notebook — sells faster and commands more money than one with mystery gaps in its service record. See the section on routine servicing for how interval tracking works and why buyers care about it.
This guide is aimed at drivers who are comfortable but not credentialed — people who have maybe done an oil change or two, can follow instructions carefully, and know enough to stop when something doesn't feel right. If that's you, read on.
Tools and Supplies You Actually Need
You don't need a fully stocked garage to handle 80% of home maintenance. Here's the honest starter list — not the fantasy list from a tool catalog:
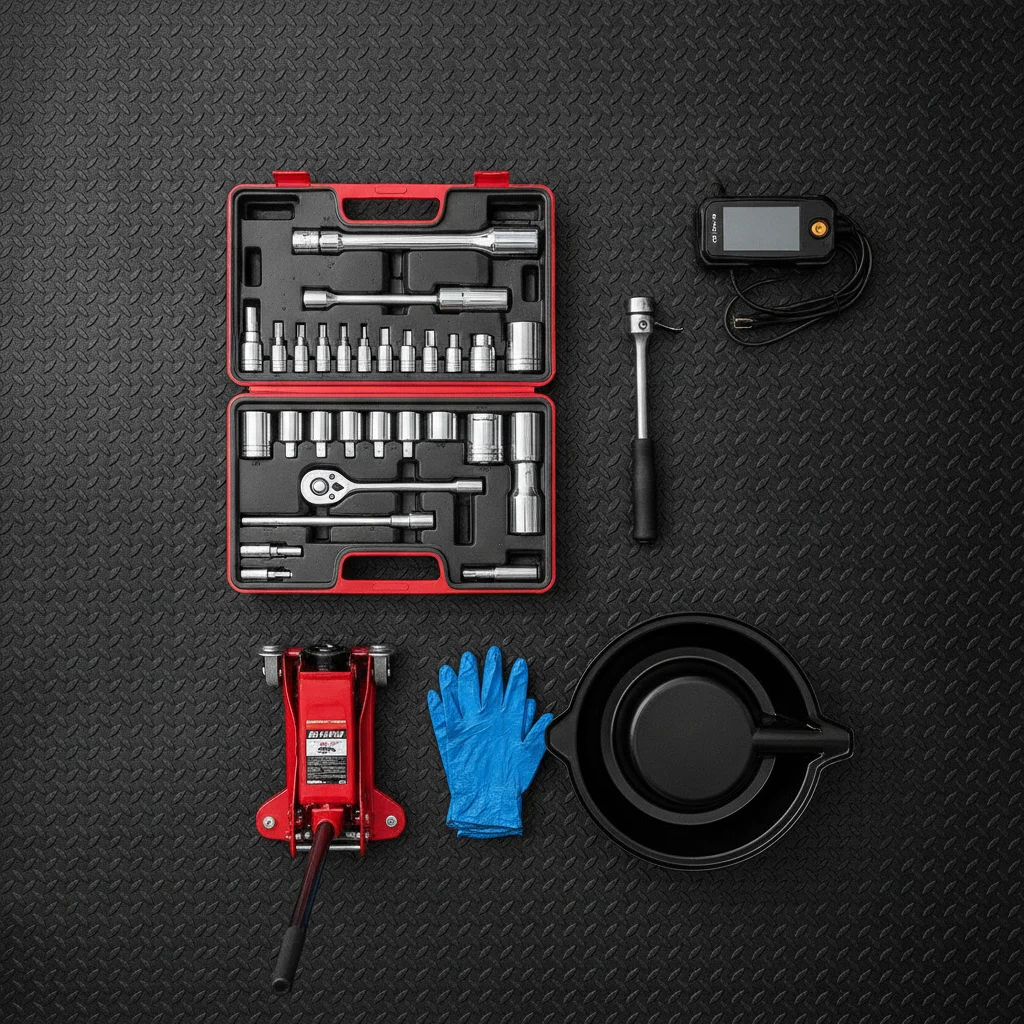
- Floor jack and jack stands — Never work under a car supported only by a scissor jack. A quality 2-ton floor jack plus a pair of jack stands runs about $80–$120 and is non-negotiable for brake or oil work.
- Socket set (metric and SAE) — A 40-piece set covering 8mm–19mm handles most drain plugs, caliper bolts, and air filter boxes.
- Torque wrench — Overtightening a drain plug strips threads. Overtightening a wheel lug can crack a rotor. A click-style torque wrench in the 20–150 ft-lb range is a must.
- Oil filter wrench — Your vehicle's filter size determines the style. Check before you buy.
- Multimeter — Indispensable for diagnosing battery health and tracing electrical faults.
- Funnel, drain pan, nitrile gloves, shop rags — The unsexy essentials that keep jobs clean and safe.
- OBD-II scanner — A $30–$60 Bluetooth unit paired with a free app lets you read and clear check-engine codes before assuming the worst.
Build Your Tool Kit Gradually
You don't need to buy everything at once. Start with the oil change tools — jack, stands, drain pan, filter wrench — and add from there as jobs require. Harbor Freight's house brands are adequate for occasional home use; for torque wrenches, spend a little more on a trusted name like Tekton or CDI.
Use Your VIN to Get Exact Specs
When ordering parts online, always use your full 17-character VIN rather than just make, model, and year. Trim levels and production dates create real part-number differences that a basic year/make/model search often misses. Most parts sites have a VIN lookup field — use it.
Once you have these tools, maintain them. A rounded socket or a torque wrench that's been dropped loses accuracy. Replace damaged tools before they damage your car.
Oil and Filter Changes
This is the foundational skill. If you can do an oil change cleanly, you can do most other fluid and filter work. Here's the full process:
- Warm the engine slightly — Run it for 2–3 minutes. Warm oil drains faster and carries more contaminants out with it. Don't let it get hot — scalding oil is genuinely dangerous.
- Raise and support the vehicle — Use your floor jack at the manufacturer-specified lift points (check your owner's manual). Set jack stands before you go under. Always.
- Remove the drain plug — Place your drain pan, then break the plug loose with the correct socket. Unthread the last few turns by hand so you can pull it free quickly and not splash oil everywhere.
- Remove the old filter — Have a rag ready. Filters hold residual oil. Pre-fill the new filter with fresh oil and lightly oil the gasket before threading it on — hand-tight plus a three-quarter turn is all it needs.
- Replace and torque the drain plug — Consult your owner's manual for the spec. Most are in the 20–30 ft-lb range. Never overtighten.
- Fill with fresh oil — Use the grade your manufacturer specifies (not what the parts store recommends). Check the dipstick after filling. Start the engine briefly, check for leaks under the car, then recheck the dipstick.
- Dispose of used oil properly — Auto parts stores accept used oil for free. Don't pour it down a drain.
Always cross-reference your owner's manual oil viscosity spec against what's actually in the car before adding any fluid. Someone before you may have used the wrong grade, and mixing them compounds the problem.
Using an incompatible oil viscosity accelerates engine wear and can void powertrain warranties — a risk that's entirely preventable with a 30-second manual check.
When installing new spark plugs, hand-thread them all the way in before using a wrench. If you feel resistance before they're flush, stop — you may be cross-threading, which destroys the cylinder head threads.
Cross-threaded spark plugs require helicoil inserts or cylinder head replacement — a repair that costs hundreds of dollars versus the seconds it takes to be careful during installation.
After a brake pad replacement, bed in the new pads properly: make 8–10 moderate stops from 30 mph without coming to a complete stop, then let the brakes cool for 10 minutes before driving normally. This seats the pad material evenly on the rotor.
Skipping the bedding process leads to uneven material transfer, which causes pedal pulsation and reduced braking performance — exactly what you just spent time trying to fix.
Keep a cheap digital tire pressure gauge in your glove box and use it weekly during temperature swings. Tire pressure drops roughly 1 psi for every 10°F drop in ambient temperature.
TPMS warning lights typically don't trigger until a tire is 25% below recommended pressure — by which point handling and wear are already being compromised.
When replacing a bulb, wear nitrile gloves or avoid touching the glass with bare skin. Skin oils on halogen bulbs create hot spots that cause premature failure.
This is one of the most common reasons newly replaced halogen bulbs burn out within weeks — it's entirely preventable with a simple habit.
Oil change intervals vary widely by vehicle and oil type. Older cars on conventional oil typically need changes every 3,000–5,000 miles. Modern engines running full-synthetic can often go 7,500–10,000 miles. Your owner's manual, not the sticker on your windshield from the quick-lube shop, is the authoritative source. See our coverage of scheduled maintenance intervals for a deeper breakdown.
Air Filters, Cabin Filters, and Spark Plugs
These three items are responsible for a significant portion of unnecessary shop upsells. They're almost always straightforward to replace yourself, and the parts cost a fraction of what shops charge.
Engine Air Filter
On most vehicles the air filter box sits right near the top of the engine — a plastic box secured by clips or a few screws. Open it, pull the old filter, slide in the new one oriented the same direction, and close it back up. Cost: $15–$25 in parts. Shop charge: $30–$60. Time required: 5 minutes.
Cabin Air Filter
This is the filter that cleans the air coming through your vents. It's usually behind the glove box (drop the glove box down by releasing its retaining clips) or under the dashboard on the passenger side. A clogged cabin filter reduces HVAC efficiency and cabin air quality noticeably. Cost: $15–$30. Time required: 10–15 minutes.
Spark Plugs
Worn spark plugs hurt fuel economy, cause misfires, and make cold starts rough. On a four-cylinder with easily accessible plugs, this is a 30-minute job. On a V6 or V8 where the rear bank of plugs requires partial intake removal, it gets more involved — but still doable with patience.
- Always replace plugs one at a time to avoid mixing up the ignition wires (on older vehicles).
- Gap new plugs to the spec in your manual — pre-gapped plugs are not always correct for your application.
- Use a torque wrench. Ceramic spark plug insulators crack if you overtighten them.
- Apply a small amount of anti-seize compound to the threads if the manufacturer recommends it (some don't — check first).
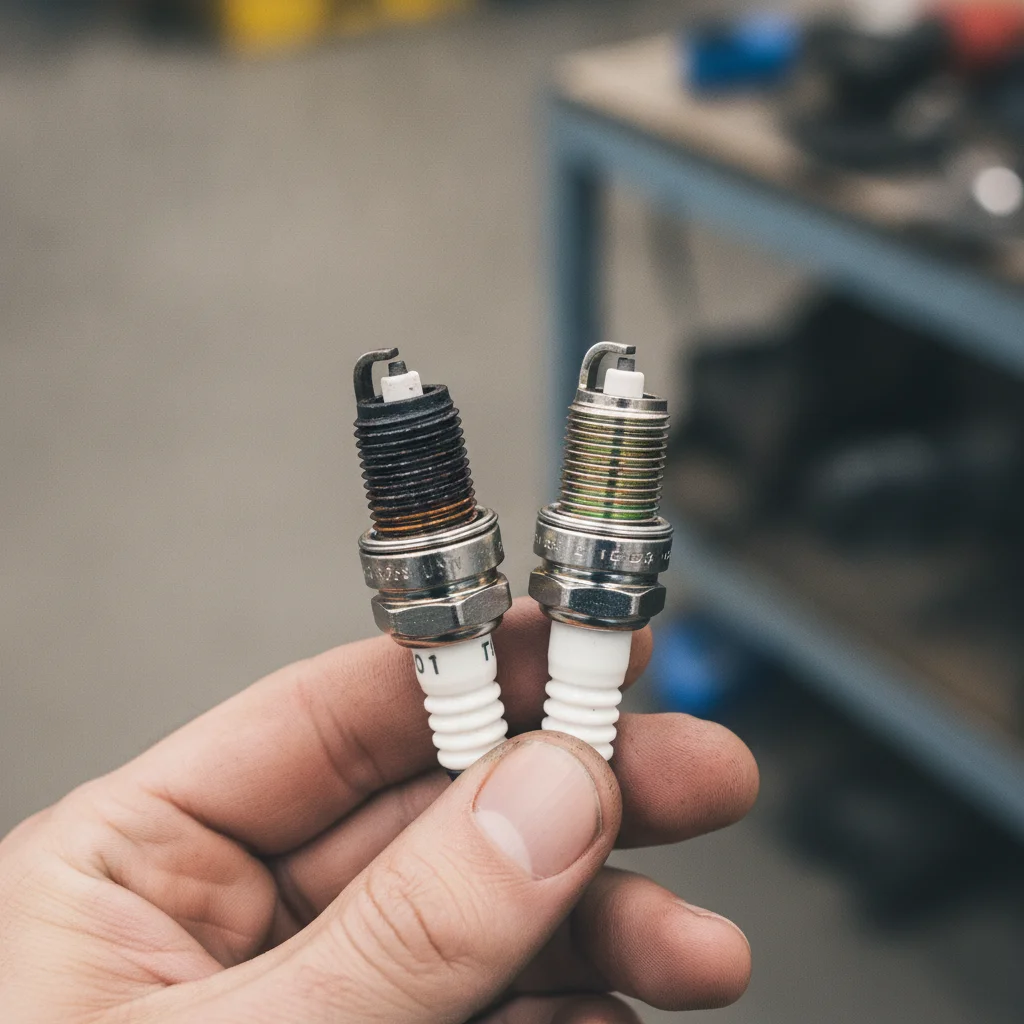
Iridium vs. Copper Spark Plugs
Many modern vehicles spec iridium or platinum plugs with extended service intervals of 60,000–100,000 miles. Replacing these early with copper plugs might seem like a cost saving, but you'll be back under the hood every 30,000 miles instead. Stick with the specified plug type for your vehicle.
Sealed Transmissions Aren't Maintenance-Free
"Lifetime" transmission fluid is a marketing term. Fluid still degrades, especially in towing, high-heat, or stop-and-go driving conditions. Most independent transmission specialists recommend a drain-and-fill every 40,000–60,000 miles regardless of what the manufacturer says — the cost is low and the insurance is significant.
EV Maintenance Is a Different Game
If you drive an electric vehicle, most of the fluid and filter work in this guide either doesn't apply or applies in modified form. The foundational skills — tires, wipers, cabin filters, brake inspections — still transfer. For a complete EV-specific breakdown, see our dedicated guide on <a href="/electric-vehicles/ev-ownership-costs/ev-maintenance-basics/everything-that-goes-into-maintaining-an-electric-vehicle-over-its-lifetime">EV lifetime maintenance</a>.
Brake Pads and Rotors: What You Can Handle
Brake jobs intimidate a lot of home mechanics, and that caution is reasonable — brakes are safety-critical. But a straightforward front or rear pad replacement on a disc brake system is entirely within reach if you work carefully and methodically.
Brake Work Requires Full Attention
Brakes are the most safety-critical system you'll touch at home. Before starting any brake job, confirm you have the correct parts for your specific vehicle. Work on one side at a time so you always have a reference for how things go back together. And never, ever compress a rear piston on a vehicle with an electronic parking brake without the specific reset procedure — you'll destroy the caliper motor.
A Fuse That Keeps Blowing Is a Warning Sign
If you replace a fuse and it immediately or repeatedly blows again, do not keep replacing it. The fuse is protecting downstream wiring and components from an active fault — a short circuit, a pinched wire, or a failed component drawing too much current. Keep replacing it and you risk an electrical fire. This one needs a multimeter and, if necessary, a shop diagnosis.
Step-by-Step Pad Replacement
- Remove the wheel after safely raising and supporting the car.
- Locate the caliper — the C-shaped clamp squeezing the rotor. Two bolts hold it on (typically 12mm or 14mm).
- Remove the caliper and hang it with a wire hook or bungee cord. Never let it dangle by the brake hose — you'll ruin the hose.
- Slide out the old pads. Note their orientation.
- Use a caliper piston tool (or a large C-clamp and an old pad) to compress the piston back into the caliper. Watch the brake fluid reservoir — it may overflow as you push the piston back. Remove some fluid with a turkey baster first if the reservoir is full.
- Apply caliper slide grease to the slide pins and the back of the new pads (not the friction surface).
- Install new pads, reinstall the caliper, torque the bolts to spec.
- Before you drive, pump the brake pedal until it's firm. This seats the pads against the rotor. Skipping this step means no braking power the first time you press the pedal.
What About Rotors?
If the rotors are scored with deep grooves, warped (you'll feel pedal pulsation), or below minimum thickness (stamped on the rotor itself), replace them. New rotors on most passenger cars cost $30–$60 each and slide off once the caliper and caliper bracket are removed. The extra 15 minutes is well worth it over turning worn rotors.
Always cross-reference your owner's manual oil viscosity spec against what's actually in the car before adding any fluid. Someone before you may have used the wrong grade, and mixing them compounds the problem.
Using an incompatible oil viscosity accelerates engine wear and can void powertrain warranties — a risk that's entirely preventable with a 30-second manual check.
When installing new spark plugs, hand-thread them all the way in before using a wrench. If you feel resistance before they're flush, stop — you may be cross-threading, which destroys the cylinder head threads.
Cross-threaded spark plugs require helicoil inserts or cylinder head replacement — a repair that costs hundreds of dollars versus the seconds it takes to be careful during installation.
After a brake pad replacement, bed in the new pads properly: make 8–10 moderate stops from 30 mph without coming to a complete stop, then let the brakes cool for 10 minutes before driving normally. This seats the pad material evenly on the rotor.
Skipping the bedding process leads to uneven material transfer, which causes pedal pulsation and reduced braking performance — exactly what you just spent time trying to fix.
Keep a cheap digital tire pressure gauge in your glove box and use it weekly during temperature swings. Tire pressure drops roughly 1 psi for every 10°F drop in ambient temperature.
TPMS warning lights typically don't trigger until a tire is 25% below recommended pressure — by which point handling and wear are already being compromised.
When replacing a bulb, wear nitrile gloves or avoid touching the glass with bare skin. Skin oils on halogen bulbs create hot spots that cause premature failure.
This is one of the most common reasons newly replaced halogen bulbs burn out within weeks — it's entirely preventable with a simple habit.
What to Leave to the Shop
Bleeding brake lines — which is necessary after any line replacement or if air enters the system — requires either a second person or a pressure bleeder kit, plus understanding of the procedure. ABS module work and brake line fabrication are firmly in professional territory. Don't improvise on those.
Tires: Rotation, Pressure, and Knowing When to Replace
Tires are the only part of your car touching the road. They deserve consistent attention, and most of what they need is simple.
Tire Pressure
Check cold pressure (before driving) at least monthly. The correct pressure is on the sticker inside your driver's door jamb — not on the sidewall of the tire (that's the maximum, not the recommended). Under-inflated tires wear faster on the outer edges, handle sloppily, and cut fuel economy. Over-inflation causes center wear and a harsher ride.
$100–$160
Average U.S. shop labor rate per hour
Labor rates at dealerships frequently exceed $160/hr, making DIY maintenance economically significant even for simple tasks.
~$200
Annual savings from DIY oil changes
Doing four oil changes per year at home instead of a shop saves the average driver $150–$250 annually in labor alone.
25%
Of cars on the road have significantly under-inflated tires
According to NHTSA surveys, roughly one in four vehicles operates with at least one tire under-inflated by more than 8 psi.
3–5 years
Typical car battery lifespan
Most standard lead-acid batteries need replacement within this window, regardless of how much or how little the car is driven.
$1,500
Potential resale premium for documented service history
Automotive valuation data consistently shows that cars with verifiable maintenance records sell faster and for more money at private-party and dealer appraisals.
Tire Rotation
Front tires on front-wheel-drive cars wear faster because they handle both steering and propulsion. Rotating tires every 5,000–7,500 miles evens out wear across all four and extends the life of the set significantly. With your floor jack and jack stands, this is a free job that typically costs $25–$50 at a shop.
Common rotation patterns:
- Front-wheel drive: Front tires move straight back; rear tires cross to the front.
- Rear-wheel drive: Rear tires move straight forward; front tires cross to the rear.
- AWD/4WD: Full cross-rotation or follow your owner's manual.
When to Replace
The penny test is a minimum — if Lincoln's head disappears into the tread, you're at 2/32" and need replacement immediately. A quarter gives you more margin — Washington's head disappearing means you're at 4/32" and should be shopping for tires. Also look for sidewall cracking, bulges, or uneven wear patterns that suggest an alignment or suspension problem underneath.
Don't Ignore Uneven Tire Wear
Tires wearing more on one edge than the other are pointing at an alignment or suspension problem, not just a rotation issue. Rotating them spreads the wear around but doesn't fix the root cause. Get an alignment check — it typically costs $60–$100 and can add thousands of miles to your tire life.
Never Use a Higher-Amp Fuse as a Fix
A blown fuse is a symptom, not the problem. Replacing it with a higher-amp fuse removes the protection that fuse was providing. If the same fuse keeps blowing, there's a short circuit or an overloaded circuit downstream — find and fix that, or have a shop diagnose it.
Stop If You Smell Burning After Brake Work
A light burning smell during brake bedding is normal. Heavy smoke, a chemical smell, or a brake pedal that stays soft after pumping means something went wrong — possibly a stuck caliper or a piston that wasn't compressed fully. Park the car and diagnose before driving further.
Fluids: Coolant, Brake Fluid, Power Steering, and More
A car runs on more than gasoline. Keeping its various fluids clean and at the correct level is one of the cheapest and most effective ways to avoid major repairs.
Coolant
Check the coolant overflow reservoir — not the radiator cap — when the engine is cold. If the level is consistently dropping, you likely have a leak: inspect hoses, the water pump, and the radiator. Never open a hot radiator cap. Flush coolant per your manufacturer's schedule (typically every 30,000–50,000 miles or every 5 years for long-life coolant).
Brake Fluid
Brake fluid is hygroscopic — it absorbs moisture from the air over time, which lowers its boiling point and can cause brake fade in heavy braking situations. Check the reservoir under the hood (it's translucent). The fluid should be light amber or clear. Dark or murky fluid needs flushing. Most manufacturers recommend replacement every 2–3 years regardless of mileage.
Power Steering Fluid
Many newer vehicles have electric power steering and no fluid to worry about. On hydraulic systems, check the reservoir and top off with the correct fluid type (check your manual). Whining or difficulty steering is often a low-fluid symptom — but also check for a leak first.
Windshield Washer Fluid
This one needs no explanation — just use a proper washer fluid rated for your climate. Water freezes in the lines.
Transmission Fluid
Automatic transmission fluid (ATF) checking varies widely. Some transmissions have a dipstick; many modern ones are sealed and require a lift and a specific procedure to check. If you're not sure, this one's worth a shop visit for the check, but knowing the interval (typically 30,000–60,000 miles for drain-and-fill on most automatics) is enough to stay proactive.
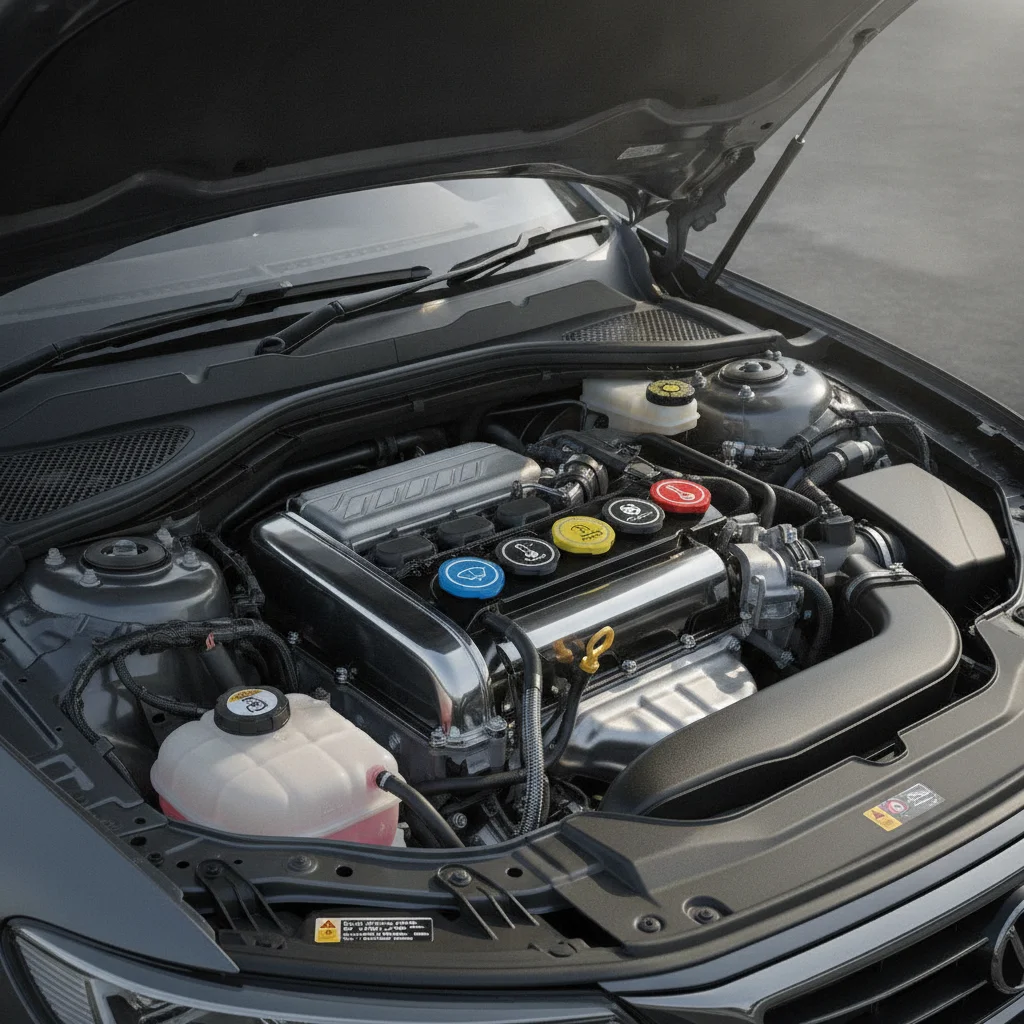
Electrical Basics: Fuses, Batteries, and Bulbs
Electrical work sounds scary, but the beginner tier — fuses, batteries, and exterior bulbs — is genuinely accessible and accounts for a surprisingly large number of roadside and shop visits that didn't need to happen.
Fuses
If a powered accessory (window, interior light, radio, horn) stops working, the first thing to check is its fuse. Your owner's manual has a fuse diagram for both the cabin fuse box (usually under the dash) and the engine compartment fuse box. Pull the suspect fuse with a fuse puller or needle-nose pliers and hold it up to the light — a blown fuse has a visibly broken wire inside. Replace with the identical amperage rating. Never install a higher-amp fuse to solve a problem — it won't fix the underlying issue and can cause wiring damage or a fire.
Brake Work Requires Full Attention
Brakes are the most safety-critical system you'll touch at home. Before starting any brake job, confirm you have the correct parts for your specific vehicle. Work on one side at a time so you always have a reference for how things go back together. And never, ever compress a rear piston on a vehicle with an electronic parking brake without the specific reset procedure — you'll destroy the caliper motor.
A Fuse That Keeps Blowing Is a Warning Sign
If you replace a fuse and it immediately or repeatedly blows again, do not keep replacing it. The fuse is protecting downstream wiring and components from an active fault — a short circuit, a pinched wire, or a failed component drawing too much current. Keep replacing it and you risk an electrical fire. This one needs a multimeter and, if necessary, a shop diagnosis.
Battery
Use your multimeter to check battery voltage: 12.6V or above is fully charged; below 12.2V it's partially discharged; below 12V it's weak. Most auto parts stores will load-test your battery for free. A typical car battery lasts 3–5 years. Replacement is straightforward — disconnect the negative terminal first, then positive; connect positive first on the new battery, then negative. Clean corrosion from terminals with a wire brush and baking soda solution before connecting.
One caveat: some vehicles require a reset procedure or coding after battery replacement (common on many European models). Look this up for your specific vehicle before you start.
Bulbs
Headlights, taillights, turn signals, and brake lights are all owner-replaceable on most vehicles — though modern LED and HID systems on newer cars can require more involved procedures. Check your owner's manual for bulb specifications. On many cars, you access bulbs through the trunk or engine bay without removing any external trim.
Always cross-reference your owner's manual oil viscosity spec against what's actually in the car before adding any fluid. Someone before you may have used the wrong grade, and mixing them compounds the problem.
Using an incompatible oil viscosity accelerates engine wear and can void powertrain warranties — a risk that's entirely preventable with a 30-second manual check.
When installing new spark plugs, hand-thread them all the way in before using a wrench. If you feel resistance before they're flush, stop — you may be cross-threading, which destroys the cylinder head threads.
Cross-threaded spark plugs require helicoil inserts or cylinder head replacement — a repair that costs hundreds of dollars versus the seconds it takes to be careful during installation.
After a brake pad replacement, bed in the new pads properly: make 8–10 moderate stops from 30 mph without coming to a complete stop, then let the brakes cool for 10 minutes before driving normally. This seats the pad material evenly on the rotor.
Skipping the bedding process leads to uneven material transfer, which causes pedal pulsation and reduced braking performance — exactly what you just spent time trying to fix.
Keep a cheap digital tire pressure gauge in your glove box and use it weekly during temperature swings. Tire pressure drops roughly 1 psi for every 10°F drop in ambient temperature.
TPMS warning lights typically don't trigger until a tire is 25% below recommended pressure — by which point handling and wear are already being compromised.
When replacing a bulb, wear nitrile gloves or avoid touching the glass with bare skin. Skin oils on halogen bulbs create hot spots that cause premature failure.
This is one of the most common reasons newly replaced halogen bulbs burn out within weeks — it's entirely preventable with a simple habit.
Electric vehicles have a somewhat different electrical profile. If you're also an EV owner, see our guide on what EV maintenance you can safely DIY for a direct comparison of where the tasks differ.
“The best car maintenance program is a consistent one. I've seen $100,000 cars destroyed by neglect and 200,000-mile beaters kept in perfect shape by owners who just paid attention. Attention costs nothing.”
— Marcus Tello, ASE-Certified Mechanic and Auto Maintenance Writer
How DIY Maintenance Affects Resale Value
Here's something shops won't tell you: buyers and dealers don't care who changed the oil. They care that the oil was changed — on time, with the right product, and that there's proof of it.
Keep a simple maintenance log. A notebook in the glove box or a shared Google Doc works fine. Record the date, mileage, what you did, what products you used, and any parts with their receipts. When you go to sell, that paper trail is worth real money. A used car with a clear, consistent service history fetches $500–$1,500 more than a comparable car with a mystery past, according to automotive market data from valuation services.

There's also a depreciation angle. Cars that are visibly well-maintained — clean engine bays, no deferred maintenance, tires with even wear — appraise higher and spend fewer days on the lot. The routine servicing hub covers how to track service intervals systematically if you want to formalize your process.
If you're maintaining an electric vehicle, the calculus is a bit different. Battery health reports and software update history play a bigger role. See everything that goes into EV lifetime maintenance for a full picture of what to track.
Routine Servicing Hub
Covers oil changes, tire rotations, and scheduled service intervals in plain language. A useful companion to this playbook for understanding manufacturer-recommended timelines.
Scheduled Maintenance Guide for New Car Owners
Walks through the full service lifecycle of a new vehicle from break-in period to first major service — essential reading if you're starting fresh with a recent purchase.
OBD-II Diagnostic Apps
Apps like Torque Pro, Car Scanner ELM OBD2, and OBD Fusion pair with a low-cost Bluetooth OBD-II dongle to read and clear check-engine codes and monitor live engine data from your phone.
DIY EV Maintenance Guide
For electric vehicle owners, this guide breaks down which maintenance tasks you can safely do at home versus what requires a technician or dealer visit.
NHTSA Vehicle Safety & Recall Database
Search your VIN for open safety recalls before performing maintenance — some recalls directly affect the systems you're about to work on and must be addressed by a dealer at no cost.
Torque Specifications by Vehicle (community forums)
Make- and model-specific forums like those on Reddit, Bob Is The Oil Guy, and manufacturer fan sites often have pinned torque spec sheets for drain plugs, lug nuts, and caliper bolts — invaluable when your manual doesn't spell it out clearly.
When to Stop and Call a Professional
Knowing your limits isn't weakness — it's what keeps DIY maintenance safe and cost-effective. Some jobs cross a line where the tools required, the risk involved, or the diagnostic complexity makes professional help the right call. Here's a plain list of where that line generally sits:
Leave These to a Professional
- Brake line replacement or fabrication — Any compromise in a brake line is a life-safety issue. Don't improvise.
- Bleeding brakes after hydraulic component replacement — Possible at home with proper equipment, but one mistake means no brakes.
- Transmission rebuilds — The tooling and precision required is beyond home-garage work.
- Timing belt/chain replacement on interference engines — If the timing is off by even a tooth, valves meet pistons. Expensive engine damage results. If you're not confident in your mechanical ability, this is a shop job.
- AC system work — Handling refrigerant requires EPA Section 609 certification and recovery equipment. It's illegal to vent it to the atmosphere.
- Airbag system service — Live pyrotechnic devices. No exceptions — shop only.
- Anything structural after a collision — Frame alignment, crumple zone integrity, and airbag replacement after deployment are all professional-only territory. See our accident procedures guide for what steps to take immediately after a collision.
Don't Ignore Uneven Tire Wear
Tires wearing more on one edge than the other are pointing at an alignment or suspension problem, not just a rotation issue. Rotating them spreads the wear around but doesn't fix the root cause. Get an alignment check — it typically costs $60–$100 and can add thousands of miles to your tire life.
Never Use a Higher-Amp Fuse as a Fix
A blown fuse is a symptom, not the problem. Replacing it with a higher-amp fuse removes the protection that fuse was providing. If the same fuse keeps blowing, there's a short circuit or an overloaded circuit downstream — find and fix that, or have a shop diagnose it.
Stop If You Smell Burning After Brake Work
A light burning smell during brake bedding is normal. Heavy smoke, a chemical smell, or a brake pedal that stays soft after pumping means something went wrong — possibly a stuck caliper or a piston that wasn't compressed fully. Park the car and diagnose before driving further.
When you're not sure whether a job is within your ability, that uncertainty itself is information. A quick call to an independent shop for their opinion — not for a sales pitch, but just for a reality check — is always free and usually honest. Good mechanics want you to know what you're doing before you undo something they'll have to fix.
The goal of all this home maintenance isn't to never see a shop again. It's to go to the shop for the things that genuinely need professional attention — and to handle everything else yourself, confidently, without overpaying.

All claims are backed by peer-reviewed research. Sources on request.