
Key Takeaways
What Actually Causes a Slow Leak
A tire that loses 5–10 PSI over a week or two isn't just being dramatic about cold weather. Something is letting air out — and nine times out of ten, it's one of four things:
- Tread puncture: A nail, screw, or piece of road debris is embedded in the tread. This is the most common cause and the one most people can fix themselves.
- Faulty valve stem: The rubber valve stem can crack with age, or the valve core inside can loosen. Either causes a steady, slow bleed.
- Rim-bead leak: On alloy wheels, corrosion can build up where the tire bead meets the rim, breaking the airtight seal. This is more common in areas that use road salt.
- Sidewall damage: A slow leak originating from the sidewall usually means impact damage or a manufacturing defect. There's no DIY fix for this one.
Knowing which one you're dealing with before you open the plug kit saves you time and prevents you from treating the wrong problem. That's exactly what Step 1 is for.
Plug Kits Are Not a Permanent Fix Alone
A string plug inserted from the outside is a temporary repair. Industry standards from the Tire Industry Association recommend a patch-plug combo applied from the inside as the permanent solution. If you use a string plug to get home, have a tire shop inspect and re-repair it properly within a week.
Check Rim and Valve Stem Before Assuming Tread Damage
Not every slow leak is a puncture. A corroded alloy rim bead or a cracked valve stem can bleed air slowly for weeks. Treating the wrong source wastes time and leaves you with a tire that still goes flat.
It's also worth understanding the stakes here. The relationship between tire pressure and road safety is more serious than most drivers realize — a tire that's chronically low increases stopping distance, raises blowout risk, and wears unevenly. Fixing the leak matters beyond just avoiding a flat.
What You'll Need
You don't need a tire machine or any specialized shop equipment for this repair. The whole job can be done in a parking lot with gear that fits in a backpack. Here's what to gather before you start:
Tire plug kit (string plug or patch-plug combo)
The core repair tool — inserts a rubber plug into the puncture to seal the air leak.
Portable tire inflator or compressor
Re-inflates the tire to the correct PSI after the repair is complete.
Tire pressure gauge
Verifies the tire is inflated to the correct PSI and confirms the repair is holding.
Spray bottle with soapy water
Pinpoints the exact leak location by producing bubbles at the air escape point.
Needle-nose pliers
Grips and removes a nail, screw, or debris from the puncture before plugging.
Tire crayon or chalk
Marks the puncture location so you don't lose it after wiping off the soapy water.
Rubber gloves
Keeps hands clean and improves grip when working with the reaming tool and plug strips.
Plug kits are widely available at auto parts stores and online for under $15 and are worth keeping in the trunk permanently. If you want to do the repair right — meaning a patch-plug from the inside rather than just an external string plug — you'll need to visit a tire shop for that step, but having a plug kit on hand gets you safely home first.
What you will need
Step-by-Step: Fixing the Leak
Run through these steps in order. Don't skip the assessment step — knowing whether the damage is actually repairable before you start saves you from doing work on a tire that ultimately needs to be replaced anyway.
Find the Leak Source
Park on a flat surface, set the parking brake, and turn off the engine. Mix a small amount of dish soap in a spray bottle of water and spray it generously over the entire tire — tread, sidewalls, valve stem, and the rim bead where the tire meets the wheel.
Watch closely for bubbles. A pinhole leak in the tread might take 15–20 seconds to show. A leaking valve stem will bubble steadily from the center cap. A rim-bead leak will show a ring of bubbles along the edge of the wheel.
[in_content_images:0]Once you spot the bubbles, mark the spot immediately with a tire crayon or chalk. If you find a nail or screw, leave it in place for now — it's actually helping plug its own hole temporarily.
Assess Whether the Damage Is Repairable
Before you reach for the plug kit, look honestly at what you found. Run through this checklist:
- Location: Is the puncture in the center tread area? Good. Is it on the sidewall or within an inch of the sidewall? Stop — the tire needs to be replaced.
- Size: Is the hole smaller than ¼ inch (6mm) in diameter? Pluggable. Larger than that? A plug won't seal it reliably.
- Tread depth: Place a quarter into the tread groove with Washington's head pointing in. If you can see the top of his head, the tread is below 4/32 inch and the tire should be replaced regardless.
- Sidewall condition: Check for bulges, cracking, or impact damage anywhere on the tire. Any of those mean replacement.
If the damage passes all four checks, proceed with the repair.
[important_callout]Remove the Object and Ream the Hole
Use needle-nose pliers to grip the nail, screw, or piece of debris firmly and pull it straight out with a steady motion. Don't wiggle it side to side — that enlarges the hole.
Next, take the reaming tool from your plug kit (it looks like a coarse metal file on a handle). Insert it into the puncture and work it in and out several times with firm pressure. This cleans the hole, roughens the inner edges, and sizes it uniformly so the plug seats correctly.
Some air will escape while you ream — that's expected. Work efficiently but don't rush.
Insert the Plug
Thread a plug strip through the eye of the insertion tool so that equal lengths hang on both sides. Apply a thin coat of rubber cement or plug lubricant to the plug strip.
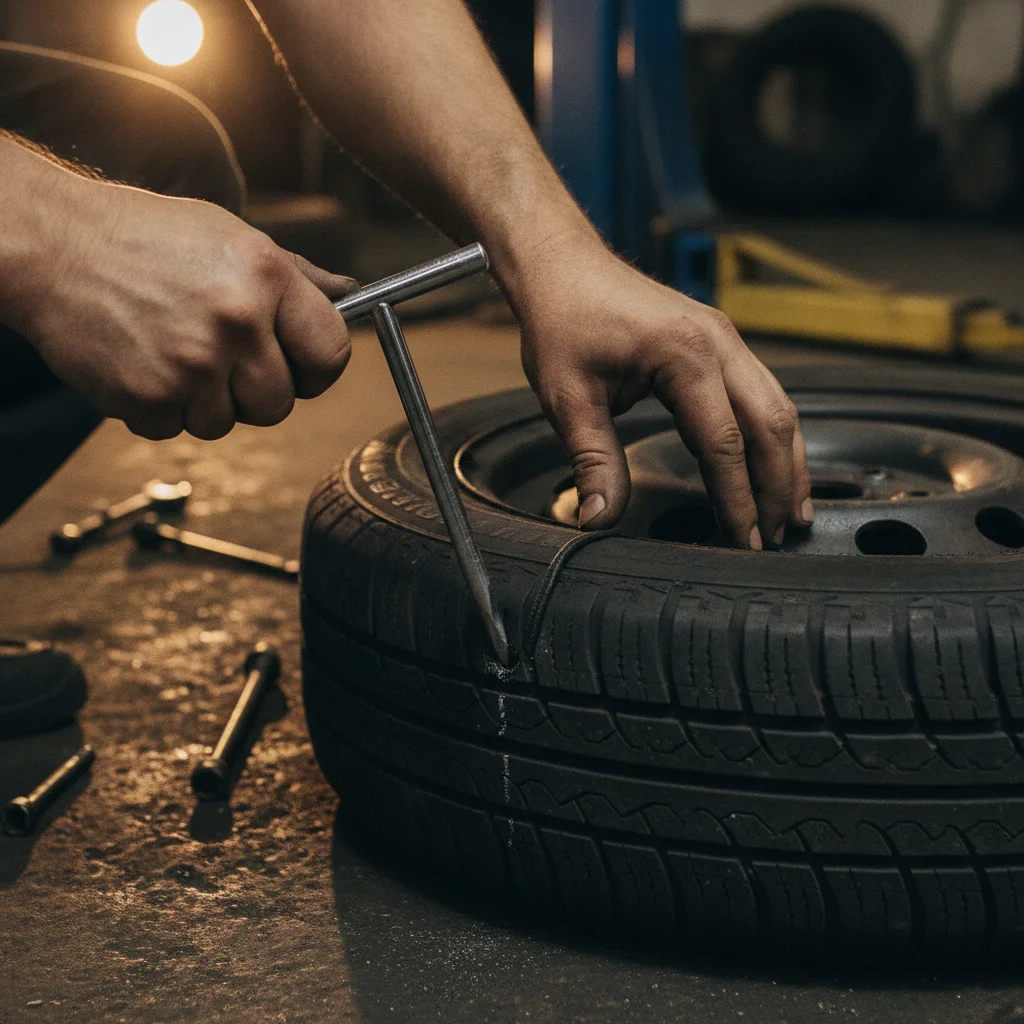
Push the insertion tool — with the plug centered on it — straight into the puncture. Use firm, steady pressure until about ½ inch of the plug remains visible above the tread surface. Then pull the tool straight back out with a quick, firm motion. The plug's friction anchor will catch on the inside of the tire and hold it in place as the tool releases.
[in_content_images:1]Trim the protruding plug ends flush with the tread surface using a razor blade or the knife included in most kits. Leave a tiny nub — don't cut completely flush — so you can confirm the plug stays in place later.
Inflate and Verify the Repair
Attach your portable inflator and bring the tire up to the PSI listed on your driver's door jamb sticker. Do not use the maximum PSI printed on the tire sidewall — that's a structural limit, not a ride specification.
Once inflated, reapply soapy water directly to the plug site and around the full valve stem. Watch for 30 seconds. No bubbles means a successful seal. If bubbles appear at the plug, the plug may not have seated properly — try a second plug alongside the first, or head to a tire shop for a proper internal patch-plug.
Check the tire pressure again after 30 minutes and again after 24 hours. A well-seated plug holds pressure indefinitely.
Monitor the Tire Over the Next 48 Hours
Check the repaired tire's pressure each morning for two days. A correctly plugged tire loses essentially no air — within normal ambient temperature variation, expect no more than 1–2 PSI change.
If the tire loses more than 3–4 PSI overnight, the plug hasn't fully sealed the leak. At that point, re-inflate and drive directly to a tire shop for a proper internal patch-plug repair. Don't keep re-inflating and hoping — a slow continuing leak means the plug isn't doing its job.
Also note that under-inflated tires significantly affect stopping distance and blowout risk, so keeping a close eye on that repaired tire is genuinely worth the 30 seconds it takes each morning.
When to Skip the DIY and Head to a Shop
This repair works well in a specific set of circumstances. Outside those circumstances, pushing forward anyway creates a safety problem, not a solution. Go to a professional if any of the following apply:
- The puncture is in the sidewall or within 1 inch of the sidewall
- The hole is larger than ¼ inch in diameter
- You can't find the leak source after a thorough soapy-water inspection
- The tire has a visible bulge anywhere on the sidewall or tread
- The tread depth is at or below 2/32 inch (Lincoln penny test: if you can see the top of Lincoln's head, it's done)
- The tire has been run significantly flat — even briefly at highway speeds
- Your plug repair doesn't hold pressure after 24 hours
Tires are not the place to cut corners. The good news is that a professional plug-patch at a tire shop typically costs $20–$40 — not a significant expense when the alternative is a blowout.
It's also worth thinking about the broader picture of which repairs actually make sense to do yourself versus hand off. Some mechanical fixes reliably pay off in resale value and peace of mind, while others rarely justify the cost — and a properly repaired tire falls squarely in the first category.
Soapy Water Is Your Best Leak Detector
Mix a few drops of dish soap in a spray bottle of water and apply it generously around the full circumference of the tread, the sidewalls, the valve stem, and along the rim bead. Bubbles appear immediately at the leak source — no guesswork required.
Mark the Spot Before You Remove Anything
Once you find the puncture with soapy water, circle it with a tire crayon or chalk before wiping off the soap. It's surprisingly easy to lose track of the exact spot once the bubbles are gone, especially on dark rubber.
Inflate to Spec After the Repair, Then Check Again
After plugging, inflate the tire to the PSI listed on your door jamb sticker — not the max PSI molded into the tire sidewall. Then reapply soapy water around the repair site to confirm no air is still escaping before you drive.

All claims are backed by peer-reviewed research. Sources on request.